Reverse Proxy.
I’ve been implementing reverse-proxy solutions in lab and in production for some time now, but I always come across the same problem; It’s not the easiest type of a system to manage, especially when there are SSL certificates involved.
Now, before I started looking for an easy-to-manage SSL solution, I figured I’d find some sort of web interface for the NGINX config files and other basic server management. After some searching and testing, I decided on Ajenti. Ajenti is a python-based linux control panel that makes installing packages and managing services very easy.
Here’s an overview, followed by a detailed guide of how to set up your own perfect Reverse Proxy.
- Prepare server: Install NGINX and fail2ban, anything else you want.
- Install Ajenti Control Panel (version 1)
- Create site configs in NGINX via Ajenti CP.
- Obtain free SSL certificate for the site(s)
1. Preparing your server:
I’m using Ubuntu 16.04.3 and will be installing some packages before installing the control panel.
#Install pre-reqs
apt-get update
apt-get install nginx fail2ban -y
2. Installing Ajenti
Run these commands as root (or sudo -i from your user account)
#Install Ajenti
wget http://repo.ajenti.org/debian/key -O- | apt-key add -
echo "deb http://repo.ajenti.org/ng/debian main main ubuntu" >> /etc/apt/sources.list
apt-get update
apt-get install ajenti -y
service ajenti restart
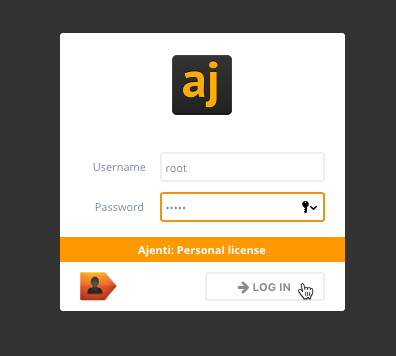
Next open up your panel at https://your-ip:8000 and log in.
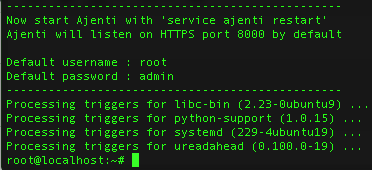
It should tell you the default user and password like below.
The default is either root / admin or admin / admin
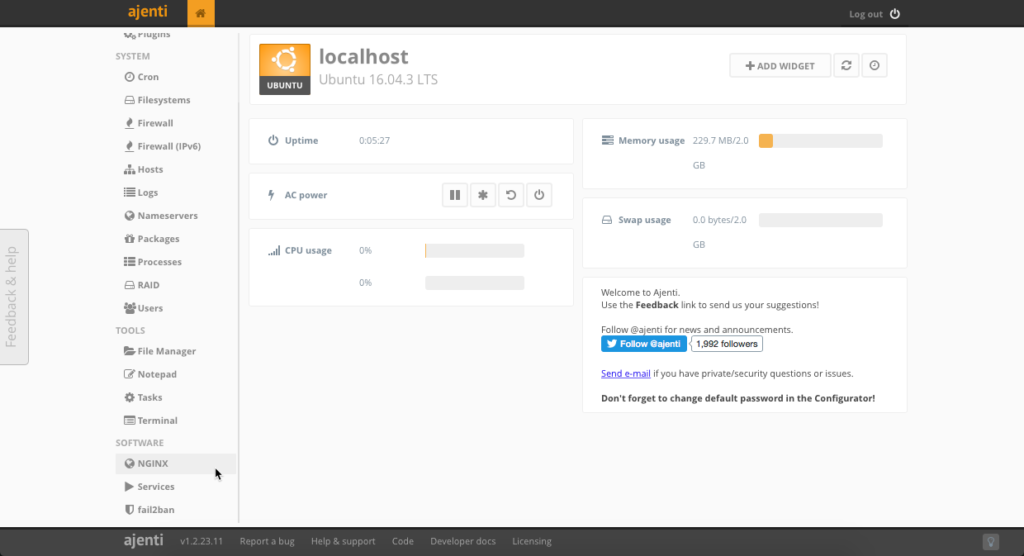
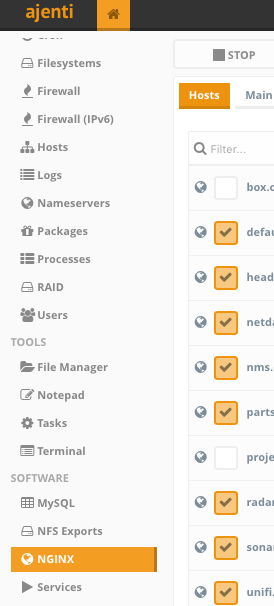
Once you’re in, you’ll notice that there are already sections in the navigation for both NGINX and fail2ban.
Any time you install a new package and want the corresponding navigation to appear in the control panel, you must restart the agent service. You can do this inside the panel too.
3. Configuring NGINX sites
Scroll down and navigate to the NGINX page.
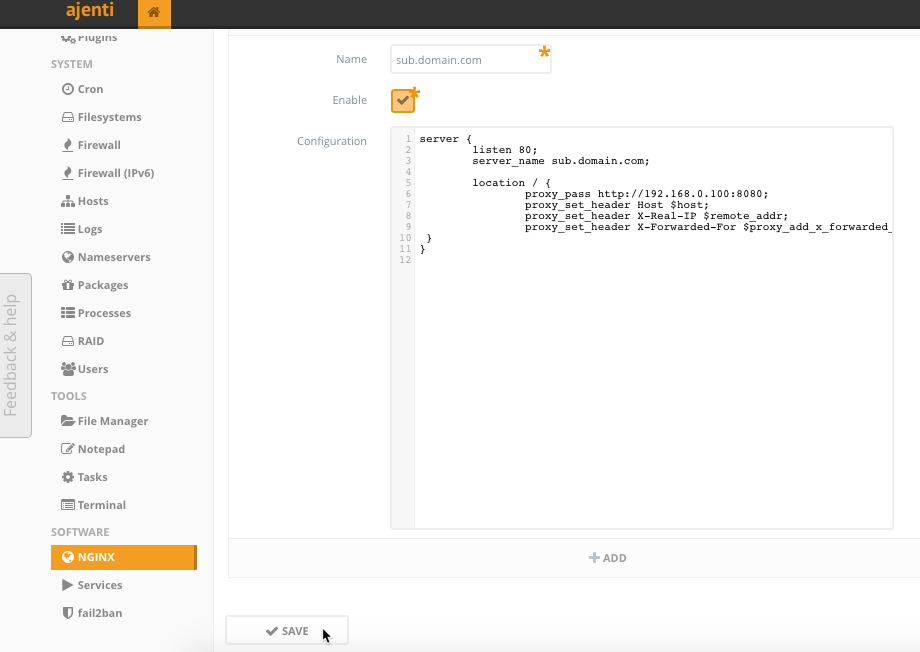
- Here you can create the configuration files via WebUI for each proxy you would like the reverse proxy to handle.
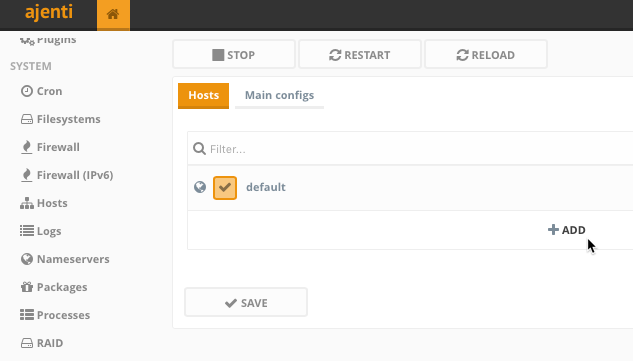
Go ahead and click + Add at the bottom and fill in the details. Your domain or subdomain should already be pointing to the public IP of this server, or your home IP with ports 80 and 443 forwarded to this server’s LAN IP.
Here is a simple proxy-pass config to get you started. Any time someone visits sub.domain.com, their request will be sent to 192.168.0.100 on port 8080. This can be reproduced countless times.
server {
        listen 80;
        server_name sub.domain.com;

        location / {
                proxy_pass http://192.168.0.100:8080;
                proxy_set_header Host $host;
                proxy_set_header X-Real-IP $remote_addr;
                proxy_set_header X-Forwarded-For $proxy_add_x_forwarded_for;
 }

}
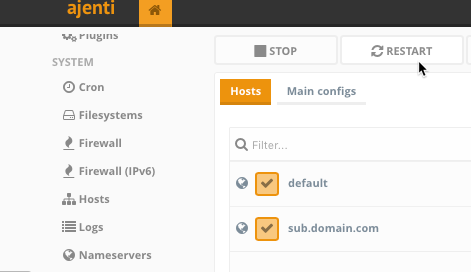
Make sure to enable the config, save your changes, and then restart the NGINX service.
As of now, you should be able to reach your server through the reverse proxy, but it is not a secure endpoint until we encrypt communications. Let’s do that now.
4. Free SSL with LetsEncrypt + Certbot
First, add the repository:
sudo add-apt-repository ppa:certbot/certbot
You’ll need to press ENTER to accept. Afterwards, update the package list to pick up the new repository’s package information:
sudo apt-get update
sudo apt-get install python-certbot-nginx -y
The certbot Let’s Encrypt client is now ready to use.
Claim your free cert:
Remember the config file you created, resembling sub.domain.com?
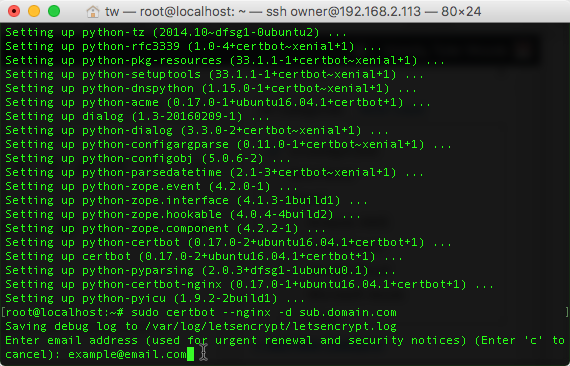
Certbot will find the config file, validate your server, install your certificate, and even modify the config to force redirection to HTTPS. Just enter the following in a shell, filling in your domain or subdomain.
sudo certbot --nginx -d sub.domain.com
It will first ask you for an email address to send renewal notices to.
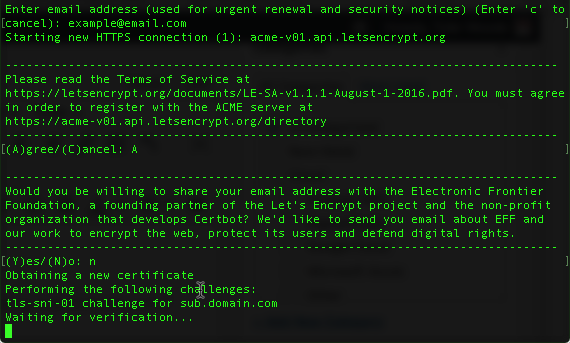
You will have to agree to terms, and then you can opt in or out of sharing your email address.
It will then verify your server.
As long as your domain’s DNS is set to the public IP of your server and ports 80 and 443 are open, this should pass and ask if you would like to redirect all traffic to HTTPS.
I usually do this, and there is a notable addition to the config done automatically:
    listen 443 ssl; # managed by Certbot
ssl_certificate /etc/letsencrypt/live/sub.domain.com/fullchain.pem; # managed by Certbot
ssl_certificate_key /etc/letsencrypt/live/sub.domain.com/privkey.pem; # managed by Certbot
    include /etc/letsencrypt/options-ssl-nginx.conf; # managed by Certbot


    if ($scheme != "https") {
        return 301 https://$host$request_uri;
    } # managed by Certbot
This can be reversed if you find the need.
Now, visit your website via domain name and you should already have a valid HTTPS!
5. You’re done!
I continue to use Ajenti and NGINX for my reverse proxy solution, and all of my subdomains have their own valid SSL certificates this way. I can spin up a project on a docker host or spin up a micro service like Transmission downloader and configure an HTTPS-secured endpoint on the reverse proxy in minutes.



17 Comments
Brian Towles · November 18, 2019 at 8:00 am
Would this still work? Been wanting to setup a reverse proxy for a long time for my Ombi / Sonarr / Radarr. Not sure if this is still a guide I could use. I’d just use the Ubuntu image you used if so!
Matthew R Toye · November 24, 2018 at 1:56 pm
Hey there. Great tutorial. I have forked and made some big changes to a the letsencrypt plugin for Ajenti. you can see it here: https://github.com/matthewtoye/ajenti_letsencrypt_plugin
Chris · August 9, 2018 at 9:03 pm
Hi Tyler,
How would you achieve SSL Termination at the proxy using your guide?
jaericho · July 10, 2018 at 7:59 pm
Excellent tutorial. I had one snag: site2.domain.com would complain that it had site1.domain.com’s cert (I had not ran certbot for site2 yet.) But once I ran certbot for site2 everything is working. Fantastic!
Tony · June 23, 2018 at 4:13 am
Superb tutorial! Everything worked as expected. I had issues trying to get Traefik to work, so I was happy when I came across your site! This setup works perfectly for what we need to do.
Tyler Woods · June 26, 2018 at 12:11 pm
Thank you so much for your feedback! I’m really happy it helped you.
werni · June 6, 2018 at 2:39 am
Hi, looking very nice… is this config already available as a Docker image?
Tyler Woods · June 12, 2018 at 5:23 pm
Unfortunately it’s not. Maybe for a future project on a rainy day. Thanks for the suggestion though.
algonrey · July 17, 2018 at 3:32 pm
Hi Tyler! i just made a docker image with your implementation of the reverse-proxy solution 🙂 i hope you don’t mind 😛
The only step i change was the use of certbot-auto instead of cerbot.
The docker image is fully funcional, but i would make some changes in order to save the config to a volume (e.g.)
Well, the docker image is this:
https://hub.docker.com/r/algonrey/prp/
prp as Perfect Reverse Proxy as you name it 😉
Regards!!
Tyler Woods · July 17, 2018 at 3:33 pm
Cheers! I will check this out soon!
werni · October 17, 2018 at 1:10 pm
Nice one! Gona check it out soon! Cheers.
Brian Towles · November 18, 2019 at 8:25 am
Do you use “certbot-auto” EVERYWHERE he has certbot listed, or just for the “repository” step? Sorry, I’m new…
Scott Yannitell · April 29, 2018 at 5:56 am
Super tutorial, man!
prog · January 26, 2018 at 5:21 am
certBot give me an error:
Failed authorization procedure. .com (http-01): urn:acme:error:unauthorized :: The client lacks sufficient authorization :: Invalid response from .com/.well-known/acme-challenge/HKDDKXqB2GEUXRonAUWMBqtPkTDpl7iHeKrkjTty_V8:
Vic · September 14, 2017 at 1:22 pm
Nice!
How to deploy a reverse-proxy using Nginx – eWiki · August 8, 2019 at 3:19 pm
[…] guide is copied from tylermade.net published by Tyler Woods on September 14, […]
Reverse web proxy (with certs) – Halo's Protest · July 10, 2018 at 8:19 pm
[…] Here is a great tutorial for setting up a reverse proxy for webservers. (Kudos Tyler and the Ajenti project.) […]