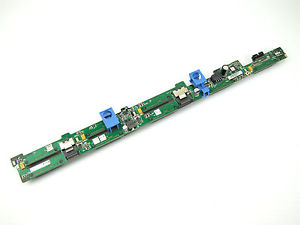
There are many cheap Dell R620s floating around on ebay, and if you can catch one at the right price, it might only have a 4-bay backplane. This is a quick fix, though, unless you have no need for the local storage space.
Personally I just upgraded mine to an 8-bay and decided I would document the steps of what it took.
Parts:
You will need a few parts. Actually just two.
Installation:
I originally took photos of the few steps this took, but I cannot seem to find them, so maybe I will upload some photos next time I pull this machine off of the rack.
Installation is fairly simple.
1. First remove any and all drives. Also remove the faceplate cover over the other 4 bays.
- Next disconnect all the components that are connecting to the backplane.
- Pull the blue tabs and pull out the old backplane.
- Remove the old miniSAS cable from the motherboard
- Drop in the new backplane
- Re-connect all the components
- Connect the new mini-SAS cable
That was easy! I hope this helps you.


2 Comments
Justin W. Richeson · April 10, 2019 at 5:01 pm
did yours already have removable bays for the other slots? I have a 4-bay system but there’s a faceplate riveted on that covers the other 4 bays…
Tyler Woods · April 19, 2019 at 5:41 pm
Wow this feels like forever ago! I’m certain the way mine came, it appeared that they were covered, but that faceplate over the extra slots was removable by some method. Did you ever figure it out or was your chassis set up differently than my post suggests?